Wow! Okay, I've taught lots of classes, but never LIVE international and I'm a bit nervous and extremely excited! I hope all the internet and computer stuff goes smoothly (I've been practicing). Sit back, relax and take notes OR pull out your supplies and get ready to CREATE!
I revised the video .. here is the link.
I revised the video .. here is the link.
Here is a general list of materials you are going to need to create this banner project...
(this makes a 5 pendant banner, so adjust your supplies as needed)
12x6 piece of chipboard
Cut 5 - 4 1/4 x 6 1/4 of designer paper (I used 5 different papers)
Hole punch/Cropadile
Modge Podge (or a sealer)
Paint brush for Modge Podge
Trims as desired (lace, jute, twine, ribbon, etc.)
Embellishments as desired (flowers, burlap, letters, bling, etc.)
Adhesive of choice (I tend to use a lot of hot glue)
Here are a few ideas to get your brain creating .... whooo hooo!
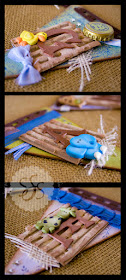
I made this banner for my swap partner in Mini Album Swaps and More on facebook. She requested a little shabby chic boy banner with the word ANGEL on it. I used cardboard to pop the chipboard letters up, trims, some clay animals, and a bit of burlap.
This one hangs in my scrap room, more pictures on a post further down. I used burlap paper to pop the chipboard letters up, homemade flowers, trims, buttons, flowers, and bling. Love this one!
Or keep things really simple like these ...
Tamra made this one :) Darling!
Here's one more, just for fun :)


No comments:
Post a Comment