Showing posts with label mini album. Show all posts

Thursday, November 5, 2015

A Christmas Carol


Wow, so I haven't gotten my hands into a mini album in a while and it was so fun and refreshing to do it again.  I used "A Christmas Carol" from G45 (which I've been told they are out of print now, but you can still purchase some at Country Craft Creations).  Also, I used a new binding system by Tamra Merrill called the Hingeless Waterfall, and it is quite genious!  It was such a fun project to make and just in time for the fun holiday season. 
 
I did make a few adjustments (as I seem to always).  My album size is quite different in size than Tamra's (smaller) and I may have put the cover together a little differently.  Anyway, I thought I would list the sizes here in case you'd like smaller size dimensions.  Then you can follow Tamra's video it putting it together.  :)
 
Cover pieces (chipboard):
cut 1 (front right side)-  7(h) x 6(w) 
cut 1 (front left side) - 7(h) x 4 1/2 (w) 
cut 1 (back) - 7 (h) x 7 1/2 (w)
cut 2 (spines) - 7 (h) x 2 (w)
 
Left side Waterfall (on the inside):
Cut 1 (base piece) - 6 1/2 x 4 1/4
Cut  6 (waterfall pieces) - 4 3/4 x 4 1/4 (score at 1/2)
 
Hingeless Waterfall (center on inside):
Cut 1 (base page) - 7 1/4 x 6 3/4
Cut 6 (main pages) - 6 3/4 x 5 3/4 (score at 1/2, 1, and 1 1/2)
(makes the pages 6 3/4 x 4 1/4 when finished scoring)
Cut 1 (part that holds the main pages down) 7 1/2 x 2 (score at 1/2)
 
Random Flips (right on inside):
Cut 1 (base) - 7 1/2 x 5 1/2 (score at 1/2)
Cut 1 (middle that connects to hinge, on top of base) - 5 1/2 x 8 1/2 (score at 5 1/4)
 
Also, I made this using only 9 pieces of 12x12 designer paper (from my winnings at Tamra's last crop hop event in September).  I only had 3 pieces left,  (about 1x2).  To do this I made my pages so the designer paper would be 4" wide on most of the pages.  Then I cut most of them at 6" in height (which isn't quite tall enough, but then I used a designer punch and black cardstock to fill the gap).  I also added about 5 journaling spots from cream cardstock to fill in any extra spaces. 
 
 
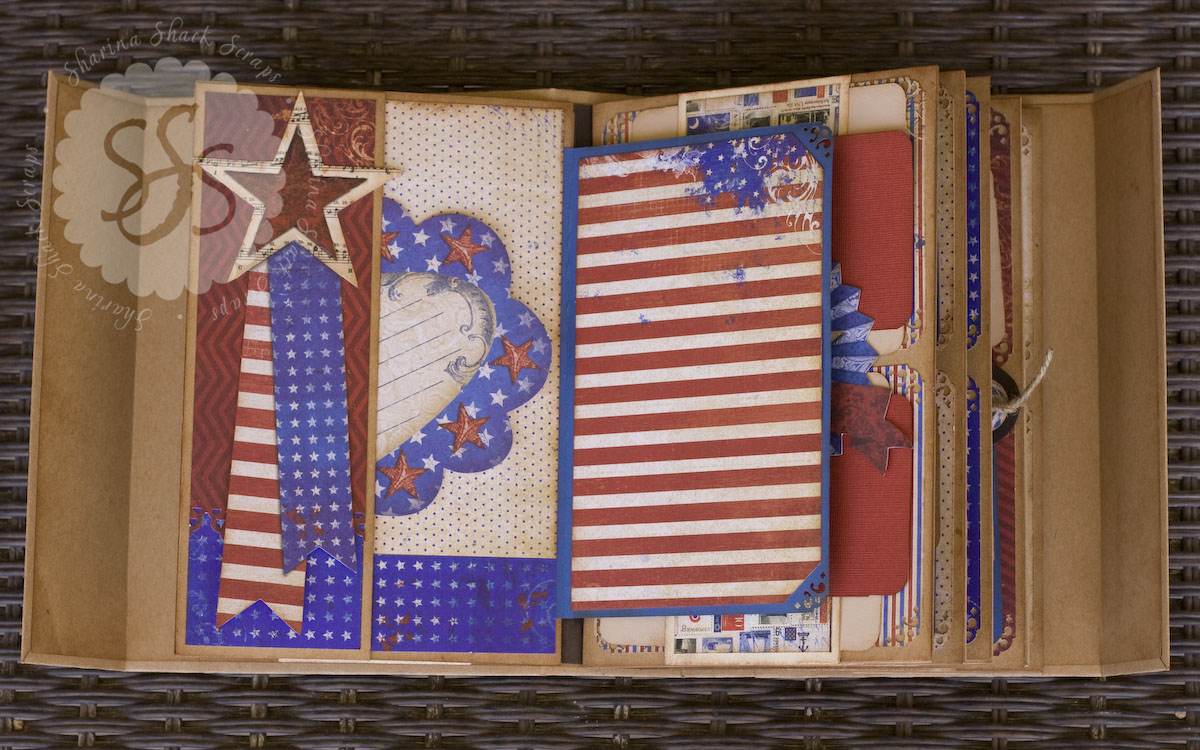
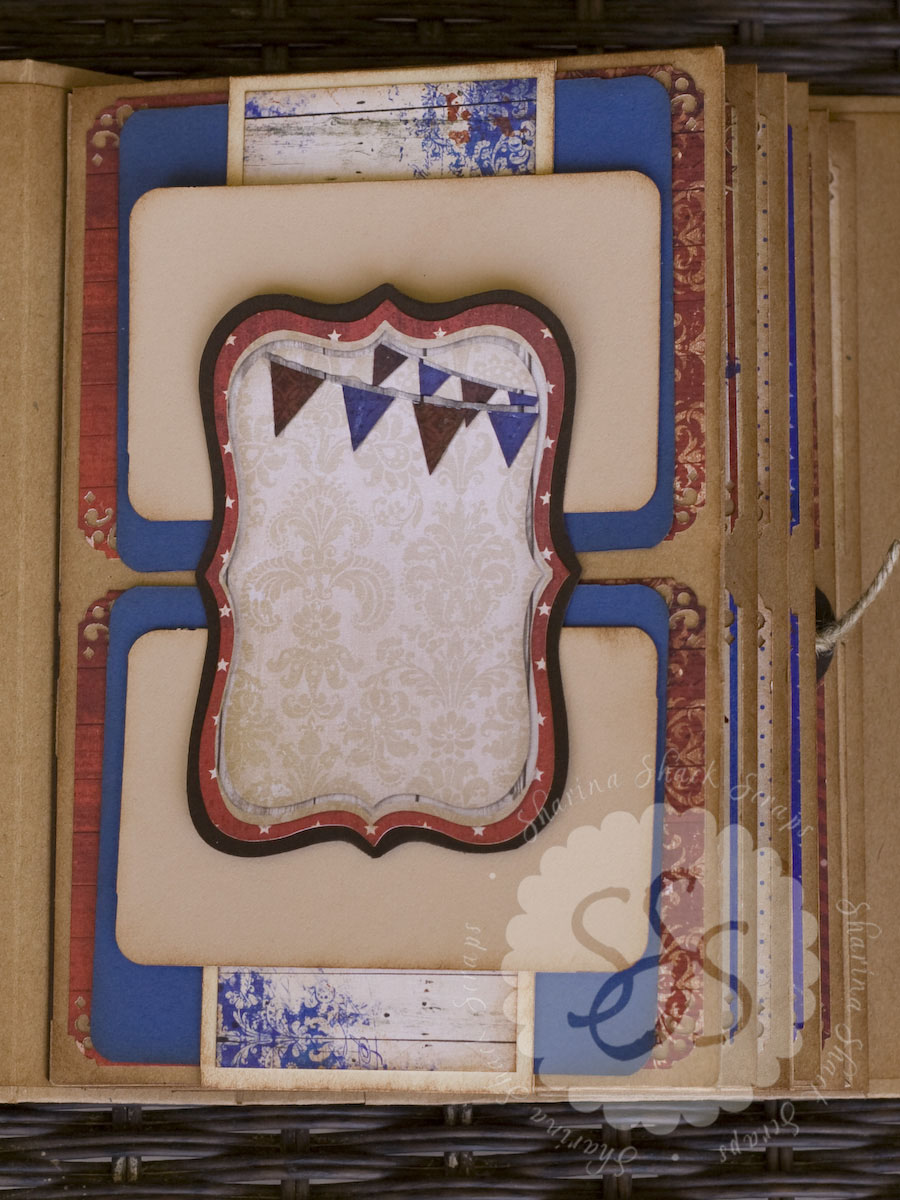
Photos of my completed album:


This is what the right side 'random flip' pages looks like when opened.
 
So much fun, gorgeous paper, great tutorials.  Happy Holidays!
 

Friday, October 16, 2015

Shadow Box Foto Folio

 
Yah!  It's my favorite time of year again - FALL!  This year has just flown by.  I've been focusing on my photography skills and business more this year, and been quite involved with a musical theater lately, so I haven't been doing much paper crafting.  However, I was so excited to pull out the Halloween décor, and find this project again :)  It was a popular one last year, so I thought I'd share it again.
This is a foto folio project that doubles as a home décor piece.  My kids love to get it down and look at the memories hidden within, EVERY YEAR!  It doesn't just sit on a shelf and collect dust  - it is well loved.  Even when company comes they ask about it and enjoy the quick look through (now that is a successful project :)
The pattern for this project is on sale on my website right now (here is the link to the pattern).  And here is the 'how to' you tube video that accompanies the project
 
Happy Halloween!


Saturday, September 12, 2015

Gatefold Halloween Album

http://sharinashack.com/product/gatefold-occasions-album/
 
Every year I get sooo excited for the Halloween/Fall season.  The summer heat fades and temperatures become pleasant (in Utah), I get into a crafty mood again, and we have sooo many fun traditions that I get so excited for!  To kick off the season I thought I'd share this Gatefold Halloween Album created a few years ago.  It requires no chipboard and comes together quite easily.  The pattern is found here on my website and is on sale this month for a great price!
 
 
Be sure to poke around the shop and look for other patterns of varying degrees of difficulty and prices.  Look up the videos on my you tube channel for a better tour of the album(s) and you might just run into several of the FREE tutorials I've done as well.  Be sure to subscribe to my channel while you are there. 
 
Happy Haunting!


Monday, July 6, 2015

Country Clock


Looking to add a little home décor to your home and still have a place to preserve all those fun memories of the season.  This Country Clock is LOADED with space for the entire season.  Tell your story with pictures of vacations, parades, trips to the beach, family BBQ - all bundled up into this clock.  You'll be amazed at how this holds together (it's pretty awesome)!  The tutorial also includes tips and tricks on how I made the clock face look real :0
 
Link to the video showing this project.

Pattern is on sale this month!


Wednesday, May 20, 2015

Dresser & Z Fold Album


I've got a fun idea for you today.  This project  is a functional dresser (miniature one) and the bottom drawer is the min album.  I image this would be DARLING as a new baby gift, because the drawers are perfect to hold little bracelets, bows, and memorabilia.  The album would be perfect as a babies first year record (you could add pictures and babies firsts or favorites). 
 
(pattern is on sale this month)


Credits: "Dear Jane" stack by DCWV

Monday, May 18, 2015

Baby ABC Book


This is my baby, when he was a baby :) Similar to my last post ... I've made an ABC book for each of my kids with their baby pictures.  (All 5 DONE!)  I pick pictures that go along with the poem (posted below) from birth to 9 months of age.  It becomes one of their favorite books to read, especially because it's all about them.   Paper here is a mix from the "Not to Shabby" collections (Parker, Penelope, and Memory Lane) all by Shabby Princess.
 

These pages are 6 x 6, and similar to my previous post, I've done this traditionally for some of my kids and digitally for some of them. These books are fun to look at and campare the features of my kids faces, to see who looks like who, etc. They also like to show them at school when they are 'kid of the week," and it helps them make learning their ABC's fun!
 
Here is the poem (revised):
I picked this up off the internet over 10 years ago and have no idea where I found it.
 

A is for angel sent from above,
B is for baby smothered with love.
C is for cute as cute can be,
D is for discovering just daddy and me.
E is for everything baby and more,
F is for father walking the floor.
G is for glad that you are finally here,
H is for heaven you bring so near.
I is for the innocence in your baby eyes,
J is for jabbering which tells no lies.
K is for kisses the sweet baby kind,
L is for love no greater you'll find.
M is for magical moments with mommy,
N is for eating your hands, nummy, nummy.
O is for the only things that you do,
P is for precious baby so perfect and new.
Q is for quiet so don't make a peep,
R is for rocking you gently to sleep.
S is for sunny sweet smiles each new day,
T is for tummy time where you can play.
U is for the unforgetable moments we share,
V is for very valuable to those who care.
W is for my wiggly wondering child,
X is for the exciement you display so mild.
Y is for yesterdays that fly by so fast.
Z is for zzz's and good dreams that last.
 
 
(I wrote this from memory ... lol .. guess I've read it a few times!)


Wednesday, May 13, 2015

Toddler Personality Books

 
I've been MIA the past few weeks with compture trouble and I've been focusing on my other love ... photography!  However, I have accomplished a couple of things during that time :) This album is for my awesome little boy.  Here is the story ....
 
(How To .... is further down the post, so keep reading)

My favorite age (so far) is between 2 and 5 years old.  Their personalities are starting to really poke out, shine, and they are gaining a little bit of independence.  I love the way they talk, what they say, their little attitudes, etc.  Although their are moments of struggle, for the most part, they keep me laughing and smiling.  However, they are still moldable and teachable (mostly), with a little patience and love.  When my first boy was this little I made a 'personaity book' of all the little bits and pieces that made up him.  I wrote down stories and took pictures to compliment them.  Then I compiled them (see pictures below for that book).  As each of  my children have grown up, I've written them a book about this ages also (only one more to go). 


 These books are fun, and have been cherished and read throughout the years. Im so glad these stories have been written or they would have been lost and forgotten, even though my kids personalities haven't really changed that much, just matured :) 
 
 
Jouraling goes on the main pages, under the pictures.
 
 
There are two pictures for each personalilty trait, and they are short pages that hide the journaling.
 
 
 The book shown above is my awesome baby number 4 :)  It was made digitally using the "Big Adventure" freebie collecion by Heather Roselli Designs, that was on the Sweet Shoppe Designs website this year. 
I printed my completed pages on 100 lb. silk cover paper, adhered them back to back, chopped the corners, and had it bound.  My little guy has been carrying it around, looking at the pictures, and having me read the stories to him ever since (so rewarding)!


How to:
 
I wanted to share how I made these albums... my first two kids albums were done with traditional scrapbooking supplies (before I got into digital), and the last couple I did digitally, but the concept and sizes are the same. 
 
 
Main pages - 5x5 inches (usually plain cardstock, because the journaling goes there)
The little decorative edging (with the personality trait on it) is - 2 x 5
Embelish as desired.
Adhere these pages back to back.
 
Photo pages - 3 x 5 inch photos
Adhere them back to back
(note: I have two pictures to show each personality trait)
 
The book has large pages for the journaling and the short pages are the pictures.
Assemble and bind.
 
This is the order my album was made:
Front cover
Mommy love you note (with two favorite photos)
Quote/Dedication page (with two favorite photos)
Personality pages (with two photos showing the personality trait on the page)
My wish for you page (with two favorite photos)
Back cover


Tuesday, April 21, 2015

Book in a Box Tutorial (part2)


These photos are of the completed Book in a Box that I used to demo my Book in a Box you tube tutorial.  I used "Sweet Memories" paper collection from Colorbok and red, green and pink coordinating cardstocks.  I added a bunch of bling for a more fabulous spring and girly look!  I also stamped some journaling places on the tag inserts and added a bit of ribbon.  I may even add a stick pin or charm to it later :)


Wednesday, April 15, 2015

Graphic 45 Design Team Video Audition 2015

 
Wow!  I'm back again with the video portion of my Graphic 45 Design Team Audition.  This has been such a fantastic adventure and I am still in shock and completely excited about make the 25 finalists in the first place!  I keep thinking about how much fun it would be to work with so many fabulous designers, I wish we could all make it and get to know each other better!
 
For my video I decided to share three projects...
 
 
However, you all know how much I love to teach - so I created a video tutorial for the mini album.  It's the smashbook that goes inside the Suitcase!  Measurements are included in the video!
 
 
Paper is "Come Away with Me" collection from Graphic 45
 
Hot Air Balloon
No tutorial yet, but I am planning on writing one :)


Vintage Suitcase


Vacation Smashbook