Monday, February 23, 2015

Sand Dollar Mixed Media

 
This sand dollar holds a wonderful week of memories for my family.  In 2013 we went to Disneyland with our 5 children, for the FIRST time!  We were so excited to go for months and I had invisioned the joy and excitement on thier faces hundreds of times.  Long story, short ... we had the most wonderful time, just as we hoped.  It was a magical week full of wonder and dreams coming true! 
 
One of the days we took a break and visited the beach.  My kids like to collect things, so they were out collecting shells and I was out taking lots of pictures.  It was also my sons birthday.  As I was walking along the shoreline I looked down and saw a tiny bit of this sand dollar poking out of the sand.  I expected to find a shell or a broke husk, but instead I pulled out this FULL sand dollar.  It was just one more wonderful thing to add to our amazing vacation. 
 
Well... it's been leaking sand every time I pick it up ... lol, but I've kept it in a safe location.  Everytime I saw it all those wonderful memories flooded back and I wanted to really capture the mood in my head.  I purchase this 5x5 shadow box frame from a dollar store to try a mixed media project and this sand dollar came to mind.  It was so fun, relaxing and refreshing to try something new and it makes me feel the way I did on the beach with my family. 


Materials: 5x5 shadow box frame, molding paste, paint (blues, white and bit of green), beads, glitter, paper flowers, fishing net, Tim Holtz bottle with sand, extra shells from our trip.


Friday, February 20, 2015

LIVE Banner crop


Wow!  Okay, I've taught lots of classes, but never LIVE international and I'm a bit nervous and extremely excited! I hope all the internet and computer stuff goes smoothly (I've been practicing).  Sit back, relax and take notes OR pull out your supplies and get ready to CREATE! 

I revised the video .. here is the link. 
 
Here is a general list of materials you are going to need to create this banner project...
(this makes a 5 pendant banner, so adjust your supplies as needed)
 
12x6 piece of chipboard
Cut 5 - 4 1/4 x 6 1/4 of designer paper (I used 5 different papers)
Hole punch/Cropadile
Modge Podge (or a sealer)
Paint brush for Modge Podge
Trims as desired (lace, jute, twine, ribbon, etc.)
Embellishments as desired (flowers, burlap, letters, bling, etc.)
Adhesive of choice (I tend to use a lot of hot glue)
 
Here are a few ideas to get your brain creating .... whooo hooo!

 
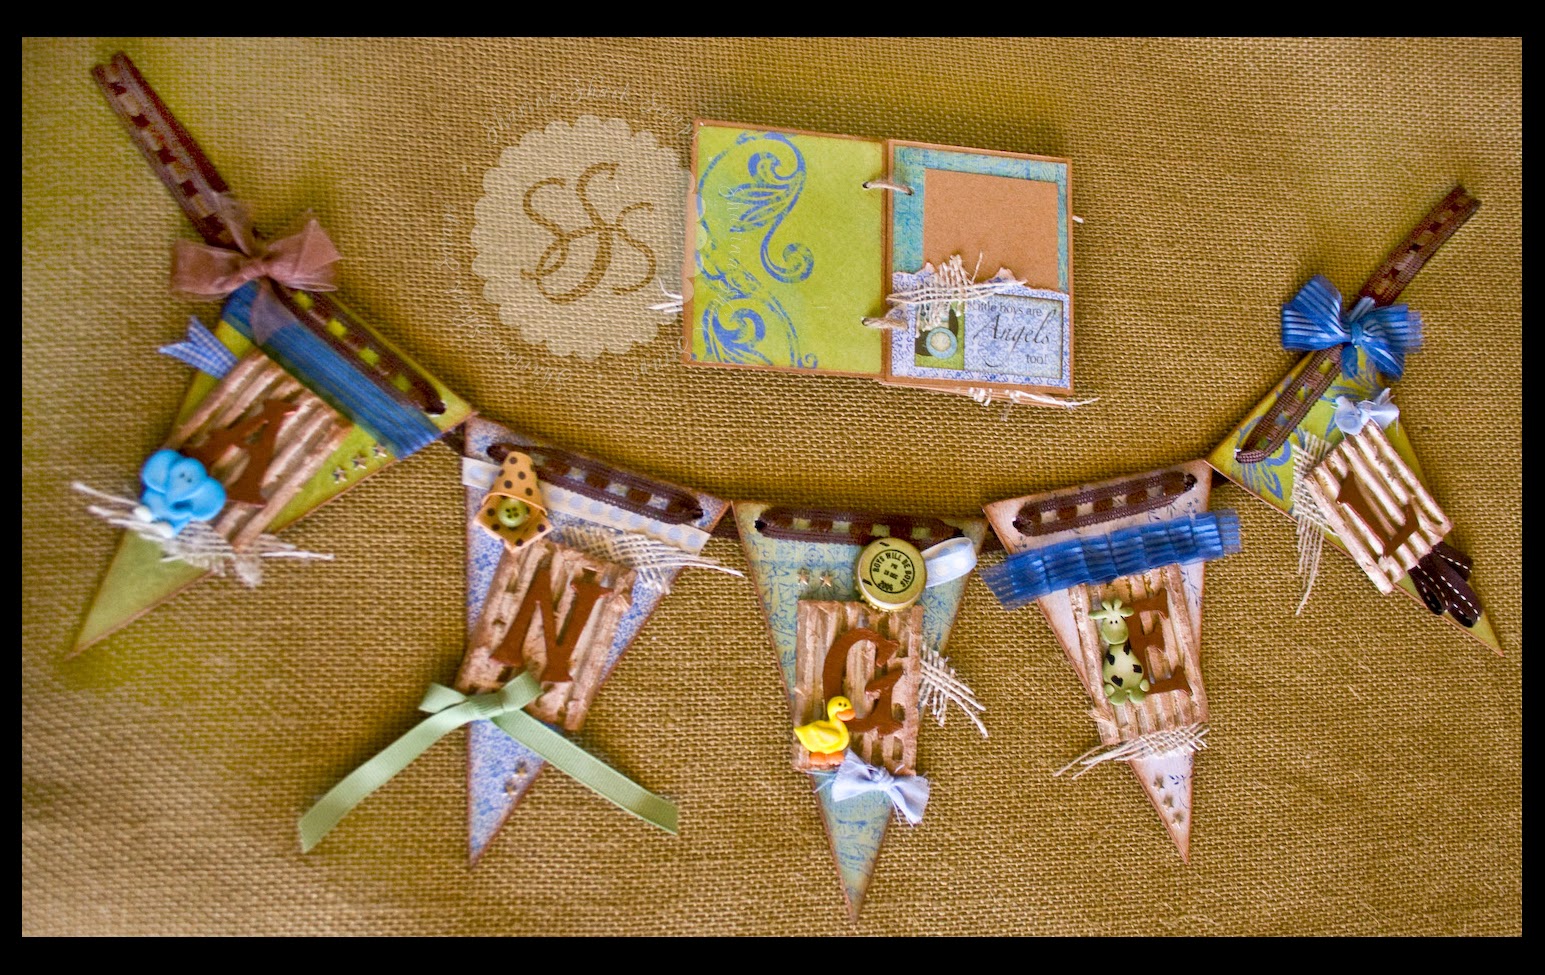
I made this banner for my swap partner in Mini Album Swaps and More on facebook.  She requested a little shabby chic boy banner with the word ANGEL on it.  I used cardboard to pop the chipboard letters up, trims, some clay animals, and a bit of burlap.


This one hangs in my scrap room, more pictures on a post further down.  I used burlap paper to pop the chipboard letters up, homemade flowers, trims, buttons, flowers, and bling.  Love this one!
 
 
Or keep things really simple like these ...
 
 
Tamra made this one :)  Darling!
 
 
Here's one more, just for fun :)


"Let's Get Together"

 
Hey everyone!  I am truly honored to be part of  Tamra blog hop this weekend.  I only met Tamra  a couple months ago in the Mini Album Swaps and More group on facebook.  She has been so kind and helpful to me as I try to pursue my dreams of creating, teaching, and inspiring fellow crafters.  So thank you Tamra, I can't tell you how much this means to me.
 
A little bit about me ... I am first and foremost a mother!  When I was a little all I every dreamed of being was a mom.  My dad made me a little kitchen set, a couch, a little baby bassinet, etc. that I remember playing with ALL the time!  I have very vivid memories of playing in my bedroom with it, later it was moved to the cold unfinished basement with a piece of carpet and I played down their for hours!  I pretended to make breakfast, lunch, dinner, play with my dolls as if they were babies, and do what I thought mother's did!  LOL  Fast forward 20 or so years and here I am :)  I have five darling children between the ages of 3 and 12 years old and I LOVE IT!!!   For 10 years I have either been pregnant or holding a newborn baby ... whooo!  There have been a lot of good days and bad days, a TON of learning, but most of all MEMORIES!!!
 
In the few months I wasn't doing newborn stuff, right before I got pregnant, AGAIN, I pursed my passion for mini albums and sharing it with those in my local community.  As a result I have collected a random assortment of mini album projects (because I love to design and create) and written a number of patterns (because I like to share and teach).  Over the years my style has changed, evolved and grown AND it continues to.
 
Last year, they closed the classroom doors were I taught.  That propelled me into FINALLY breaking into social media (cause I'll be honest, I avoided it! I was afraid it would take me away from my first love -- my family!)  But I knew that was the next step for me.  I finally stumbled upon one facebook group that I have truly loved "Mini Album Swaps and More," and where I met Tamra.  This group has given me friends who really enjoy the craft and challenges I would have never tried had someone else not suggested it.  Social media was super scary for me (crazy I know), but I have met people I would never know anywhere else and they have lifted me.  I hope to inspire you in return!
 
A couple other things to note here... I am also a photographer (but I hate to say that here cause these pictures do NOT show my skill -- I took these a couple years ago, so be kind).  For better photos scroll down to other posts :) lol  I started pursuing photography about 3-4 years ago because I was spending so much time outside watching my kids and hardly anytime inside crafting.  I needed something to keep me learning and growing and not wasting away watching bikes ride up and down the street or sitting at the park... lol, all summer long! At least I could be out documenting my kids fun and all these MEMORIES even though I didn't have time to scrap them ... lol! 
 
I'll be honest, I do not know if I am doing things the right way or the correct order, I am just journeying :)  So...now I am pursuing social media (and I am slow at it)! but I keep taking tiny steps and I have new dreams to persue and grow towards.  Some of these dreams are to attend and even teach or demostrate at CKU and CHA, host/teach living streaming classes, be part of a design team, take my kids to Disneyland, continue to grow WITH my husband (who I have to say is amazing! couldn't do any of this without him).  I am excited about the future! 
 
I am super excited to have you here, peruse the blog, be inspired, laugh, cry, make memories! 
Oh and I almost forgot, lol, here are the links to the you tube video showing the "Let's Get Together" album and the pattern on my website.
 
Thank you so much!
Sharina Shack


Wednesday, February 18, 2015

Who am I?

I have been searching, pondering, meditating, and praying to know were to go with my life and what to persue next.  I have been holding questions in my mind and searching for help, for knowledge, for experiences.  I have been consuming self-help books, audio tapes, etc.  I'm hungry for learning, for knowledge and for growth :) 
 
Last night, while looking for videos on 'live streaming,' (because I'd 'like to teach classes) I stumbled upon a company called Creative Live (they teach FREE education classes on-line).  One of their educational focuses is photography education and I LOVE photography, so I went searching for something, anything really.
 
That search led me to an amazing woman, Jasmine Star, wedding photographer.  In the videos I found she shared her story, her thoughts, her struggles, her ideas AND she connected to me in soo many ways.  Now... I am not looking to get married (very happily married with 5 children thanks), but her story so inspired me that I couldn't stop thinking of the difference it had already made in my life.
(video that inspired me)
 
The point that stood out most to me (and I'm sure I'll find something new another time, because I'm a geek and love to watch the same inpirational videos thousands of times), is that YOU are your BRAND.  Okay, back story here...in my other studies I've been wondering 'what is my niche?  The thing that makes ME different than anybody else?'  Especially in this world where we often think that we can't compete with those so much more amazing than us.  I look at all the amazing you tubers, bloggers, design team members, photographers and think "I am so far behind the game, I'll never catch up, let alone succeed." 
 
Jasmine helped me see that I can only start where I am with what my skills are, and to find or create my niche market I need to show and share who I am. YOU are your BRAND. 
 
One of her strengths is writing (I too like to write and have written in journals for years) but she wrote on her blog and layed out all her fears, joys, frustrations, etc. for everyone to see (very brave)!  I've always written for me, not because I'm ashamed of what I write, but because I didn't think anyone would find 'me' interesting.  Oh, have I been wrong!
 
So, I am changing my boring blogging style to a more fun and exciting blogging style TODAY!  Instead of just posting photos of my projects and links to my website and patterns, I'm also going to share with you who I am?  What makes me tick?  Why I do what I love?  Who inspires me? What I'm afraid of and how I overcame it? Etc.  I'm sure I'll be sharing what I have studied and learned along the way, so ... come back and watch me grow AND grow with me!
 
Sharina Shack
(I have got to get myself a fun, personalized signature here)


Saturday, February 14, 2015

Valentines Day Party!

 
Happy Valentiens Day! from our little crew :)  We hope you had a wonderful day full of LOVE!
This is my last Valentines DIY post.  We try to keep things simple, fun, and doable for even the little one of our crew. 
 
Materials: little helpers, streamers, jello, valentines paper plates, construction paper, chocolate candie molds, colored chocolates, strawberries, whip topping.
 
How to:
1.  Decorate!!!
My little girl LOVES to decorate and she is super creative.  I leave the streamers to her and always smile at what she comes up with.  I cut out hearts from red, pink, and purple construction paper so my two boys can 'heart attack' our kitchen ... they LOVE this!
 
 
2.  Make some fun, simple dishes/snacks.
My oldest son carved roses out of strawberries.
My oldest daughter has taken a liking to cooking, so she was in charge of making the chocolate lips.

 
3.  Have fun being together and creating memories! 
This simple set up has become a tradition over the years.  They have taken over just about every process so I can just sit back, do a little directing, and take lots of pictures.  I laugh and smile a lot and look forward to our Valentines Day party! 

 
Happy Valentines Day!

Friday, February 13, 2015

Bird Cage Valentine

 
Valentines Days is tomorrow! are you ready? Today's tutorial is a Valentines Bird Cage (so cute!)
There a lot more steps in this process, but it was still a fun and easy one to do.
 
Materials: 3 3/4 inch sqaure chipboard, 1 sheet of 12x12 cardstock, some embellishements, adheseives, paper trimmer, scissors.
 
How to:
1. This project starts with the base of the bird house.  Trace and cut out a 3 3/4 inch circle from chipboard and cardstock.
2.  Adhere the cardstock to the chipboard base.
 
 
 3.  Design something fabulous to be caged in your bird cage, and adhere it in anyway you need to.
 
 
4.  Cut a 12 x 1 inch strip of cardstcok.  Starting at the back carefully adhere it along the bottom edge of the base.
5.  (optional) fill the base with something fun (I used cream confetti here). 
 
 
6. Cut 6 strips of cardstock 1/4 x 12 inches each.
7.  Glue 2 strips together forming a "+" (repeat 2 more times)
8.  Adhere the "+" intersections together in a radial fashion.
 
 
9.  With the intersection on top, gently fold the strips down and adhere them to the 1 inch cardstock on the base.

 
10.  Cut a 1/4 x 2 inch strip and adhere it together to form a cricle.
11.  Adhere it to the top of the birdcage to from a  top.

 
12. Finish embellishing as desired.

 
This darling bird cage could be used for any function or season.  Wouldn't it be funny to put a Lephricahn in one for St. Pattys Day, or flowers for a center piece at a spring luncheon. 

Thursday, February 12, 2015

Burlap Banner Tutorial

 
It's a beautiful day! and there is so much to be grateful for ... as I have been creating these simple projects I've been pondering the things that I love most.  I started with a list:  my family, friends, religion, home, talents, and much more.  My thoughts have turned to 'why' I am grateful for these many things and the impact they have had in my life.  While creating this banner think of one thing you are grateful for and why. You'll come away with a darling display and a HEART full of LOVE!
 
Materials: burlap, Stiffy (or fabric stiffiner, Modge Podge works great too), stencil brush,  scissors, paint of your choice, a piece of scrap cardstock, trim.
 
How to:
1.  Cut a length of burlap 7 inches tall (I used a light burlap here).
2. (optional step) Turn under one long edge 1 inch, sew it down to form a casing for your trim.
(you could also hot glue it down to form a casing)
3. Stiffen the burlap with Stiffy or other fabric siffener.  Be sure to tap the stiffener into the fibers of the burlap.
4.  Cut triangles from your fabric (with the casing across the top of your triangle pendants).  If you cut them in a VVVV fashion you can use the triangle pendants without the casing for another banner.
 
 
5.  Cut a heart shape from your scrap cardstock (or use a template) and center it on the pendant.

 
6.  Using paint and stencil brush tap STRAIGHT DOWN forcing the paint into the fibers of the fabric.  Remove the stencil and allow it to dry. 

 
7.  (optional) I added a little extra color to the edges of the pendants by inking up the edges with Distress Ink (Tim Holtz -vintage photo). 
 
Repeat for all pendants.

 
8.  Thread the pendants onto your trim (I used jute), and add a dab of hot glue to each opening to hold pendant to the trim.  This will help keep the pendants from sliding into each other as it hangs.

 
Hang and enjoy!

Wednesday, February 11, 2015

Button Heart Frame Tutorial

 
Welcome to Day 3 of my everyday Valentines fun.  Here is another fun idea for you ... and oh so simple!
 
Materials: frame, buttons, designer paper, trim, glue.
 
How to:
1. Cut the designer paper to fit in the frame (may or may not have a glass front).
2.  Lightly draw a heart on your paper with a pencil.
3.  Dump a handful of buttons on your paper and begin re-arranging until you have a basic heart look.  (Note: there can be gaps in random places, that what the second layer of buttons is there for).
Adhere those buttons down.
4.  Arrange a second layer of buttons on top of the first ones.  Be sure to cover any holes and spots that you don't like.  Adhere those buttons down.
5.  Place your creation in your frame.
6. Tie trim or a strip of fun fabric around the entire frame.


Credits: I used the leftover pieces of sample paper from my LOVE banner project to create the background paper.  Frame from Ross.

Monday, February 9, 2015

Loves of My Life Tree Tutorial

 
I think this has been my favorite DIY project, because it combined four LOVES of my life(photography, scrapbooking, making home deocr, and my family)!!! 
 
Materials: 3x4 printed pictures, black cardstock, scrapbook embellishments, mini clothes pins (or clips of some kind), a 6 inch tall vase, floral foam blocks, paper confetti, some 2 -3 feet tall, skinny sticks.
 
How to:
1. Print your pictures at approximately 3x4 inches.
2. Cut black cardstock at 3 1/4 x 4 1/4 inches (as many as you have pictures).
3.  Adhere pictures to the cardstock.
4. Embellish photo cards as desired.
(Note: you can use mini close pins, clips or any means that works
for you to attach your picture cards to your tree.


5.  Push the foral foam blocks or pieces, into the vase.  Make sure they are secure and won't wobble around.  Glue them into place if needed.
(Note: I got this vase at the DI for .75 cents, but you could always
buy and unfinished one also and paint it the color you want - I got lucky!).


6.  Poke the sticks into the floral foam so the branches are scattered. 
Secure the branches into place with hot glue.
 
 
7.  Cover the floral foam with paper confetti and glue it down.
(Note: you could also cover it with candies, crete paper, etc.).
8.  Add an embellishment (found this heart pick at Walmart).

 
9.  Pin, clip, or tie your picture cards into place on your Loves of Life tree.
 
Display and enjoy the smile this project brings to your life!

Vintage Mailbox and Letter Bundle Mini Album


Here is a bonus project for this weeks fun celebrations.  My kids are busy making valentines boxes for thier friends and schoolmates, so I decided to make a Valentines box as well ...
 
This is a fun and simple mini album in a vintage style, however it can easily be adapted to any style of paper. The mailbox lid lifts open, like an older style mailbox would, and the mini album fits inside. The mini album was designed to resemble a stack of old love letters, tied simply with a bow.
Here is the video showing the project.

Link to the pattern, on sale this Valentiens Season.


LOVE Banner Tutorial

 
I have been working on some quick and easy Valentines decor this past week.  I was going to post them all in one post here, but I have decided to bring everyone a little bit of love everyday this week instead. So ...
 
First project share for this wonderful week of Valentines is a small and simple "LOVE" banner.
This banner came together extremely fast. Usually I like to add lots of fun texture, dimension, and elements to a project, however this one I kept very simple. I created it to use for multiple purposes ... valentines decor banner, to hange behind my infant during infant photoshoots, or to have couples holding it during engagement photoshoots. Because of these dual functions, simplicity was a must.
I LOVE how it turned out.
 
Materials: chipboard, designer paper, chipboard letters (or stencil the letters on), hole punch, and ribbon.
 
How to process:
1. cut 4 chipboard squares 3 3/4 x 3 3/4.
2.  cover the chipboard with designer paper.
3. prepare chipboard letters (or letter stencils) and adhere one letter to each square.
(Note: I painted chipboard letters black, then sanded the
edges.  Finally, I inked the distressed edges for
a more worn look).
4. Punch holes in the top two corners of each square.
5. Thread a 32 inch piece of ribbon through the holes.
(Note: I also hot glued the ribbon to the back of the chipboard
so that it wouldn't shift when hanging).
6. To make the loops on the ends (for hanging) I folded the remaing ribbon towards the back of the banner and  hot glued them to the back.  Then I tied a knot it the double layer of ribbon to the side of the chipboard.


Banner is approxiametly 16 inches when hanging.
 
Creidts: Provo Craft samples paper, and "Chip Chatter" tall letters from Pressed Petals


Saturday, February 7, 2015

Sassy Love Notes Premade 12x12, 8x8, 6x6 Album

 
Valentines is almost upon us, are you ready?  Here is a PREMADE album, just add your photos and print for a fun album your loved ones will cherish.  The ”Sassy Love Notes“ Album is made with the Sassy Love Notes Collection, and has 6 double page spreads (thats 12 pages), plus a cover and back page.  The pages can be 12x12, 8x8, 6x6 or any other square size you'd like.